
Member Tips 1 First Steps
Welcome to our Locally Controlled Social Network!
This is our Welcome page new members are directed to after clicking the Registration submit button.
While using our locally controlled social network is similar in many ways to using Facebook or Twitter, there are a few important differences. In the following four articles, we will cover important first steps for using our social network to build relationships with other members based on location and or common shared interests.
Hopefully, you are aware that there is an Information War being waged against us. Those waging this war use top-down Technology like Facebook and Twitter – networks filled with trolls, bots and fusion agents - as weapons to manipulate us by controlling what we read, what we are allowed to write and ultimately what we think. Using one of our free locally controlled networks to build real connections with your friends and neighbors is one of the first and most important steps you can take to get back your freedom.
Our goal is to provide you with a series of simple steps you can take to regain your freedom. The first step is to move away from Gmail (which is basically an insecure data mining tool) and replace it by getting a free secure Proton Mail address. While you can use any email address to register with our network, switching to Proton Mail is an important first step to protect your online accounts and passwords from being taken over by hackers.
We will begin with a review of the registration process. You should enter both your first and last name. Then enter your email address twice on the registration form. For your nickname, please use lower case letters with no spaces. Below this is a box called “Note to Admin” where you should type a sentence or two explaining why you want to join our network. This is followed by a Member Directory box which by default is set to Yes. Including your name in the Member Directory will help others with similar interests find you. Then click Sign Up Now- which will bring you to this Welcome page.
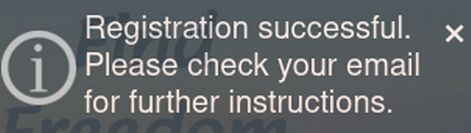
Clicking Signup now will trigger this popup to appear at the top of the page letting you know that you should check your email:
Clicking Sign Up Now will also trigger sending you a Welcome Email with your initial login password (which you can and should change after logging in). This Welcome email will explain that your registration is being reviewed. If you do not see the email in your Inbox, check your Spam folder. If you do not get the Welcome email at all, email us and we will help you get signed up.
In order to better screen out trolls and bots from our network, your registration will be reviewed by an actual person who will actually read what you typed in the box called “Note to Admin” when you registered. Trolls and bots have trouble filling in this box. But if you provide us with any actual information about you and why you want to join, it is highly likely that your membership in our network will be approved. However, this process may take a day or two. So please be patient. You should get a second email letting you know you have been accepted. You can then log in with your nickname and initial password. If you do not get the second email within a week, email us directly and we will help you get signed up.
Step 1 Set your Profile Image
The first screen you will see after logging in is the Profile Image screen. There will be a Browse button which opens your file manager where you can navigate to and select your Profile Image. While any image will do and there is a cropping tool to crop your image to a square, you can help us lower the cost of our network (and allow us to server more members) by formatting your Profile image before you load it. If you are using a Linux Debian laptop, you can open your profile image with an image editor called Gthumb.
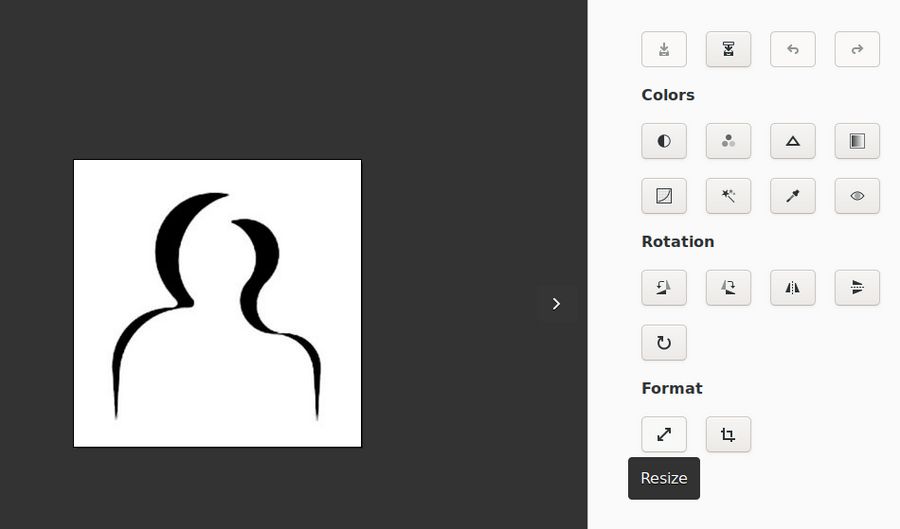
Click the Resize button to bring up this screen:
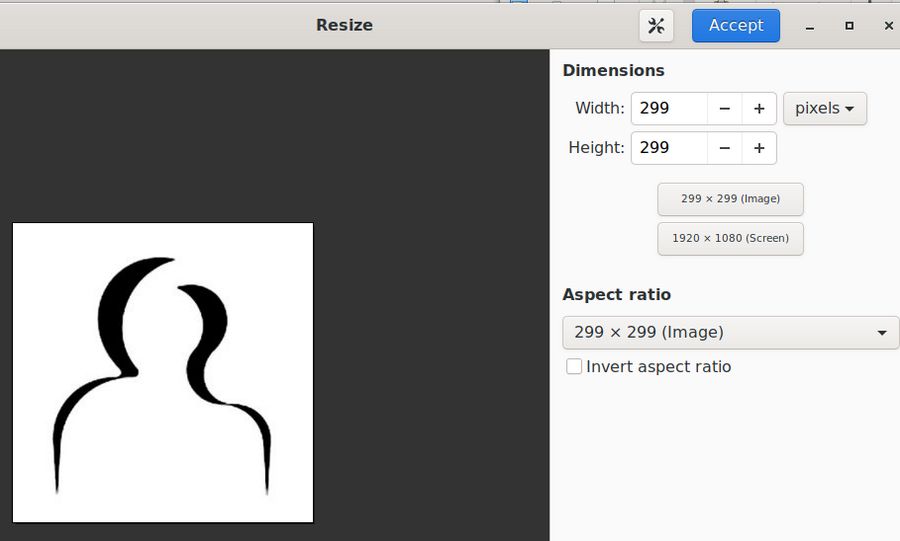
Reduce the Dimensions until the smallest dimension is 300 pixels. Then click Accept. Then click the Crop button which is to the right of the Resize button. Crop the image so that both dimensions are 300 pixels. Then save the image as profile-image.jpg.
Next, copy your image to a Libre Writer document. Then right click on your Profile Image and click Compress. This screen will appear:
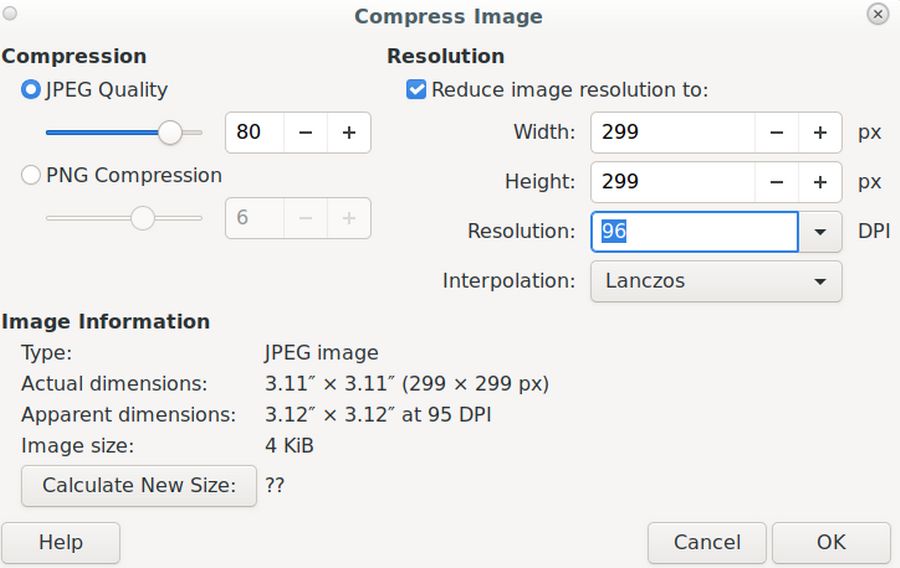
Change the resolution to 96 DPI. Then save the image as my-profile-image.jpg. PNG images are also acceptable. The profile image should be less than 150KB. Then use this image as your profile image you will set when you first log in.
Our network will automatically convert your profile image into three sizes. The Profile image on your Home Profile Page side menu is called the Profile Photo. It is 300px by 300px and has a resolution of 96 DPI.

The middle size image is called the Thumb image. The thumb is displayed in the Member Directory and also to the left of your posts and comments. It is 80px by 80px and has a resolution of 96 DPI.

The smallest image, called the Micro image is displayed on the Navigation bar. It has a width to height of 48px by 48px:
![]()
To change your Profile image after you have set it with a different image, or if you initially skipped this step when you first logged in, go to Profile, Edit Profile. Then click Profile picture.
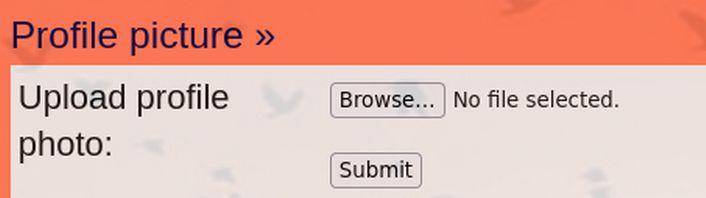
Click Browse. Then select your profile image. Then click Submit. This will bring up the cropping tool. Adjust the area. Then click Crop.
Change your Password
After cropping your profile image, hover over your name or image in the top navigation bar. A Member Menu will appear. Click Settings, then click Change Password. Here you can enter your new password twice and then enter your initial password to make the change. After clicking Save Settings, this confirmation popup should appear at the top of the page:

Step 3 Change your Member Pages Appearance Style
After changing your password, click Settings. Then in the left menu, click Display. Scroll down the page and change the style to any of six styles: Freedica (the default style), Freedom, Meadow, Mist, Sky or Sun. We will use Sky to help our screen shots. Then click Submit. Then click Submit again for the change to occur.
Step 4 Tour our Social Network
Click the Home menu item which is your personal Profile Page:
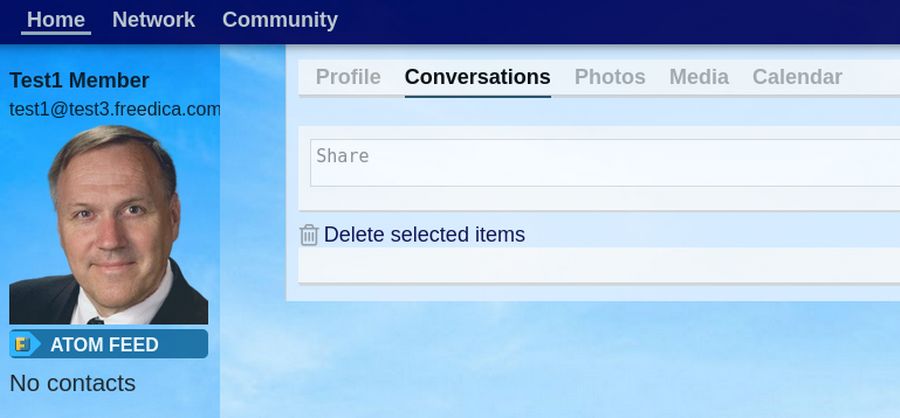
It starts at the Conversations tab which is where your posts are displayed with comments from other members. Click the Profile tab:
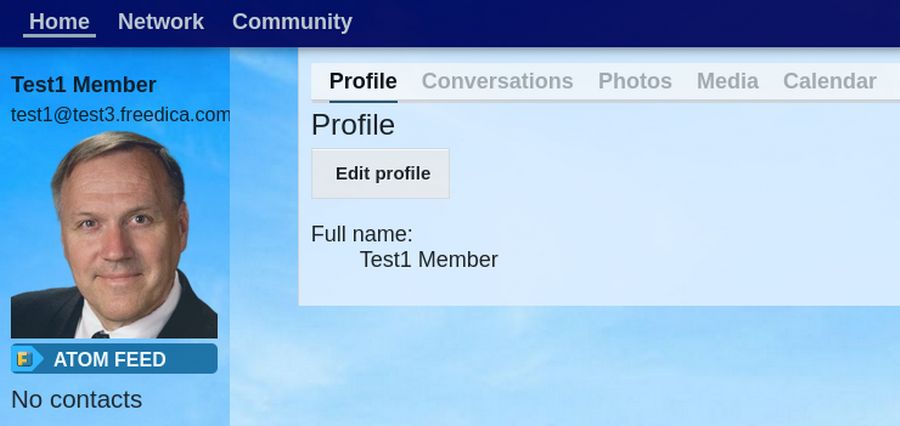
After you complete your Profile information, this information will be displayed on your Profile Page. Click Edit Profile to see the Edit Profile Details page.
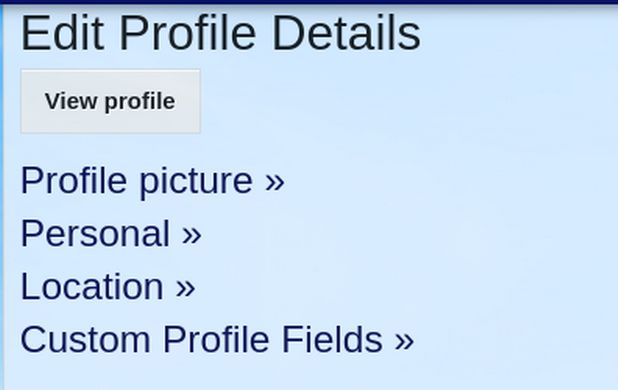
Click Personal to see the Profile Information form:
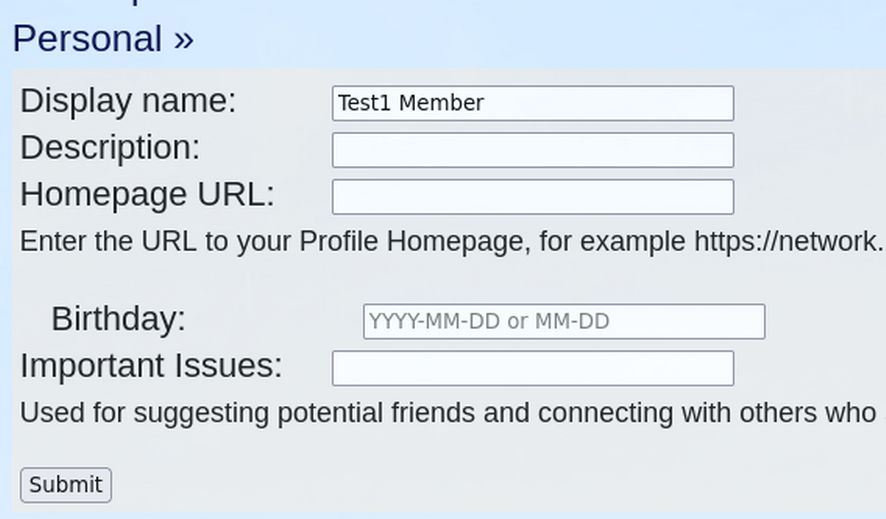
We will explain how to fill out the Information form as well as how to fill out the Location form and create Custom Profile Fields in our next article. For now, click Network.
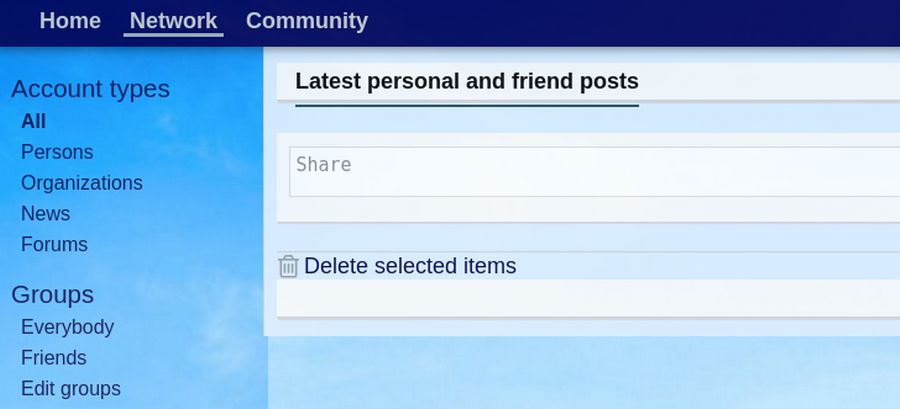
Network is a Timeline of posts from you as well as posts from other members you have made connections with. Click Community.
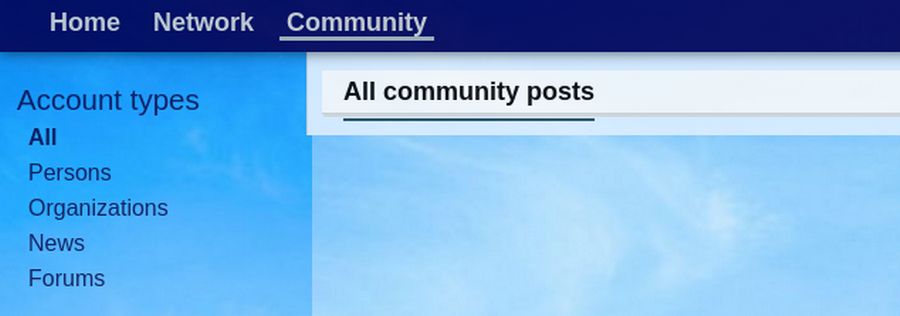
Community includes posts from everyone on our network. We will cover how to search the community in our next article and how to create searchable posts in the article after that.
Summary: Our Network uses three different timeline pages
Home Profile Timeline Page – Posts that you have created
Network Timeline Page – Posts of your contacts and your posts and posts of the hashtags you are following.
Community Timeline Page – Posts posts created by all members of your network.
What’s Next?
Now that you have a better feel for how our network works, in our next article, we will review the process for creating your Profile Page and making friends.